The following steps are to be performed by a D2L/Brightspace Administrator: The following will cover Tool Registration, Tool Deployment, and Course Link creation
Tool Registration
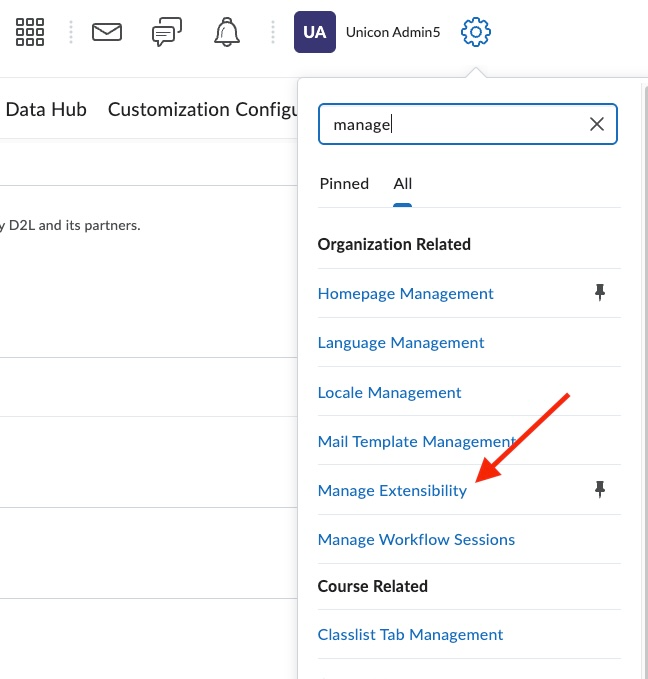
Log in as administrator in your D2L/Brightspace instance, select the gear in the upper-right corner of the page and select Manage Extensibility from the list.
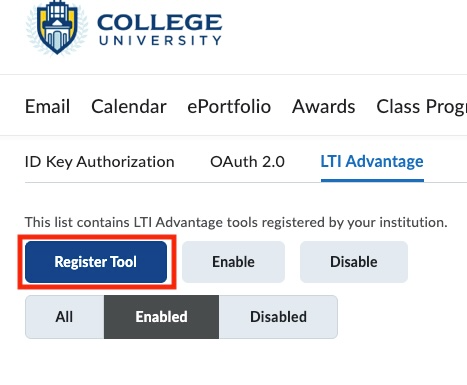
Select the LTI Advantage tab and click the Register Tool button.
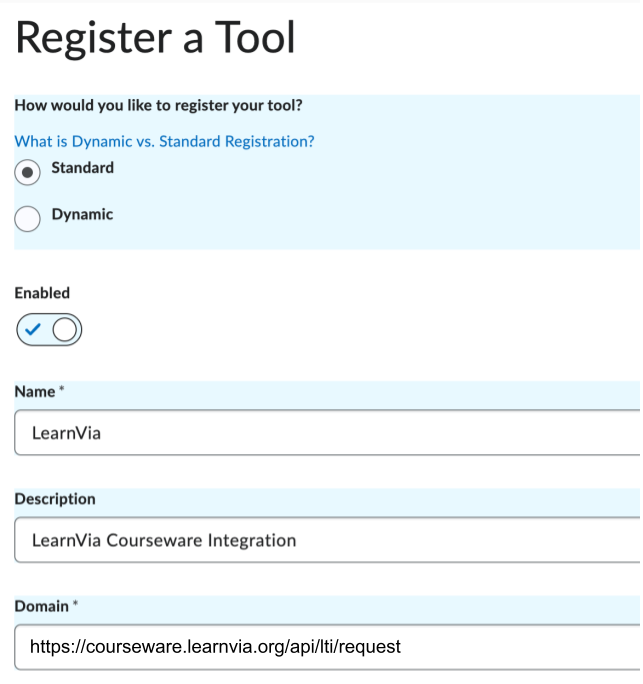
On the Register Tool page, select Standard for registration type. Select Enabled for the tool. Give the tool a name, optional description, and add the domain for the courseware deployment:
https://courseware.learnvia.org/api/lti/request
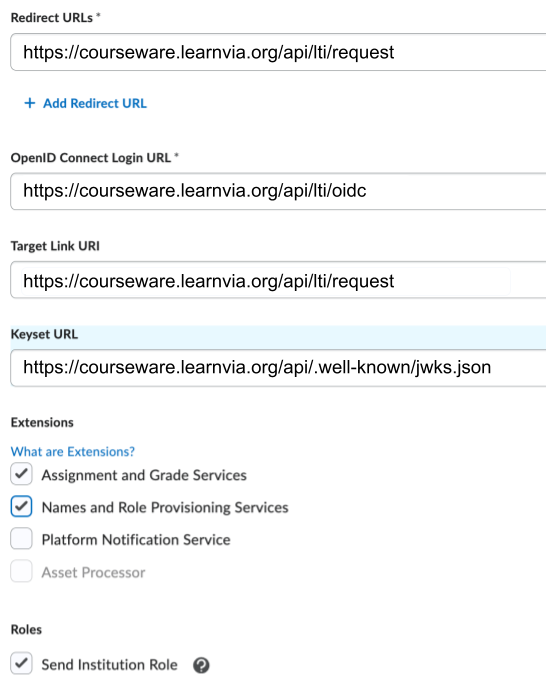
On the same page configure the redirect URL, OpenID Connect URL, Targetlink and Keyset URLs:
Redirect URL and Target Link URI: https://courseware.learnvia.org/api/lti/request
OpenID Connect Login URL: https://courseware.learnvia.org/api/lti/oidc
Keyset URL: https://courseware.learnvia.org/api/.well-known/jwks.json
Enable Assignment and Grade Services and Names and Role Provisioning Services under Extensions and select Send Institution Role under Roles.
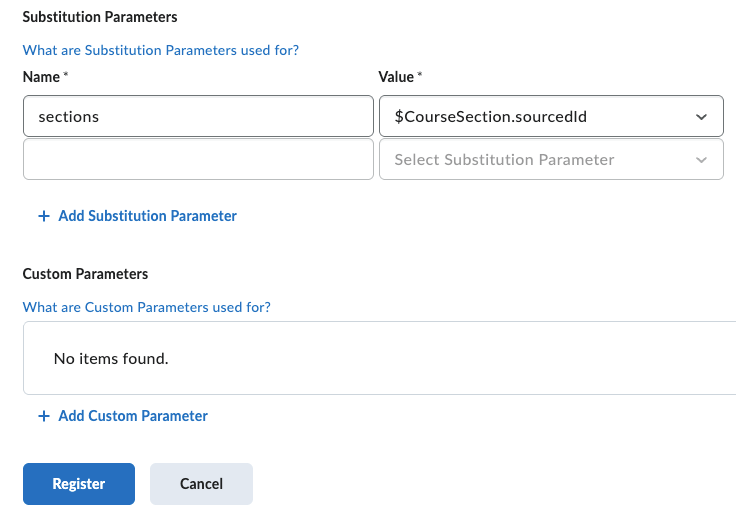
For substitution parameters, add sections as a new name and select $CourseSection.sourcedId from the Value dropdown.
Click the Register button at the bottom of the page.
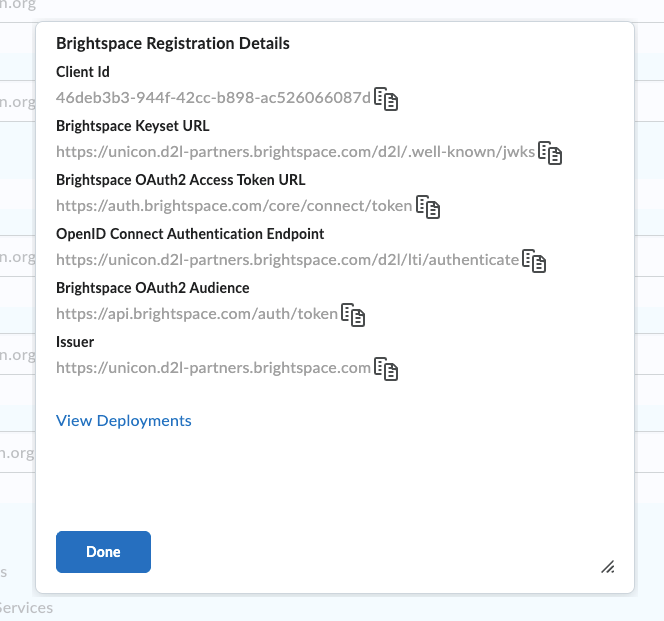
You’ll be presented with registration details. Copy the Client Id for reference later and click Done.
Deploy an external learning tool for LTI Advantage
Deployments allow sharing of registered tools in Brightspace to specific org units or descendants of parent org units.
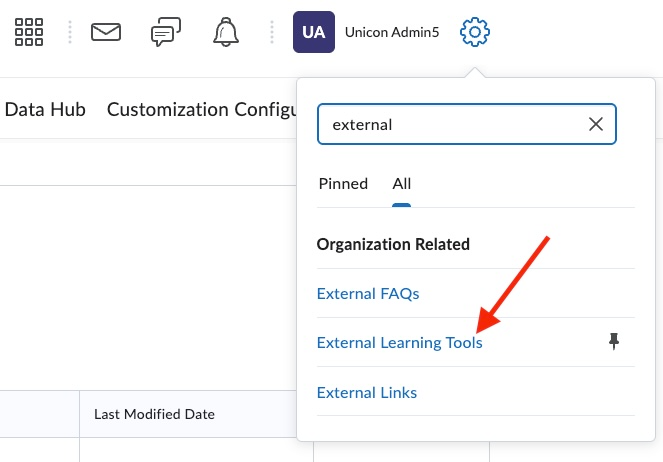
From the Admin Tools menu, click External Learning Tools and click New Deployment
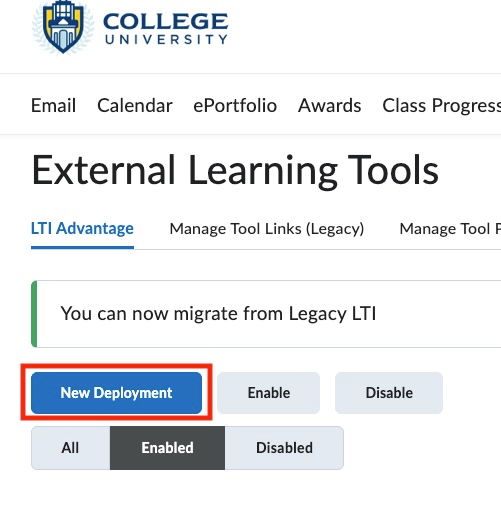
We’re now deploying the tool that was created in the first section.
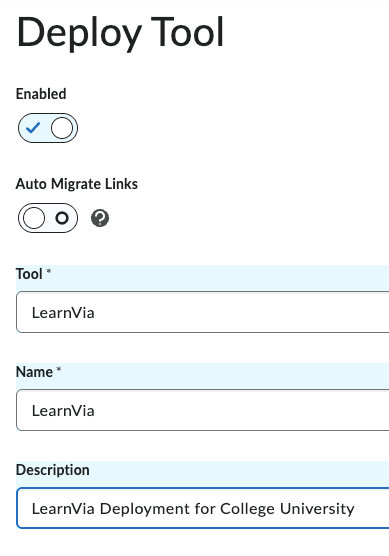
Enable the deployment and select the LearnVia Tool that we just created from the Tool dropdown. Name the tool and provide an optional description.
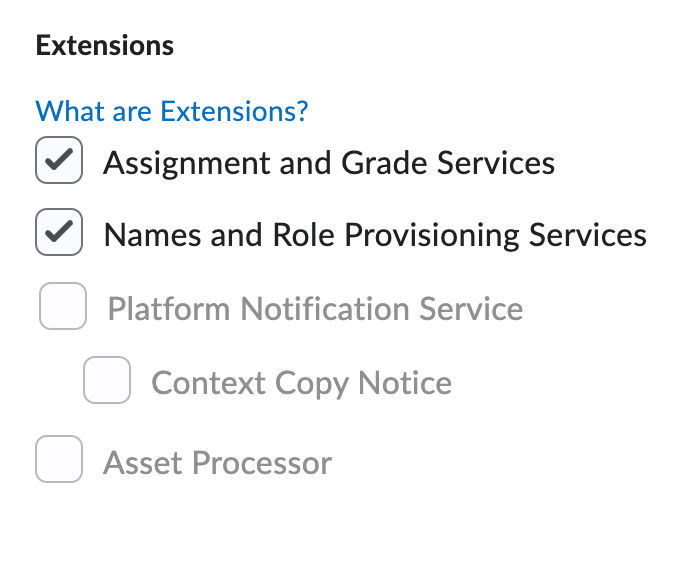
For this deployment, select Assignment and Grade Services and Names and Role Provisioning Services.
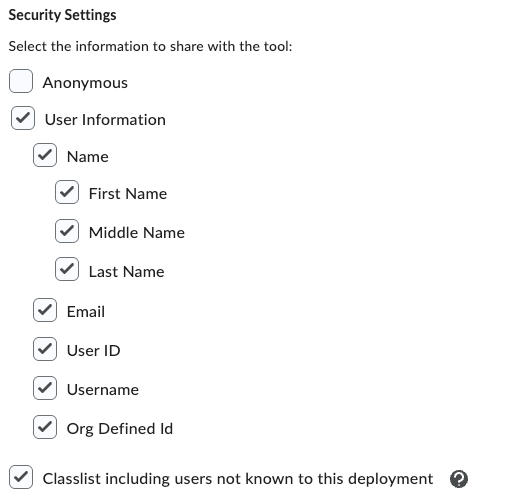
For the security settings, select all information sharing options except “Anonymous”.
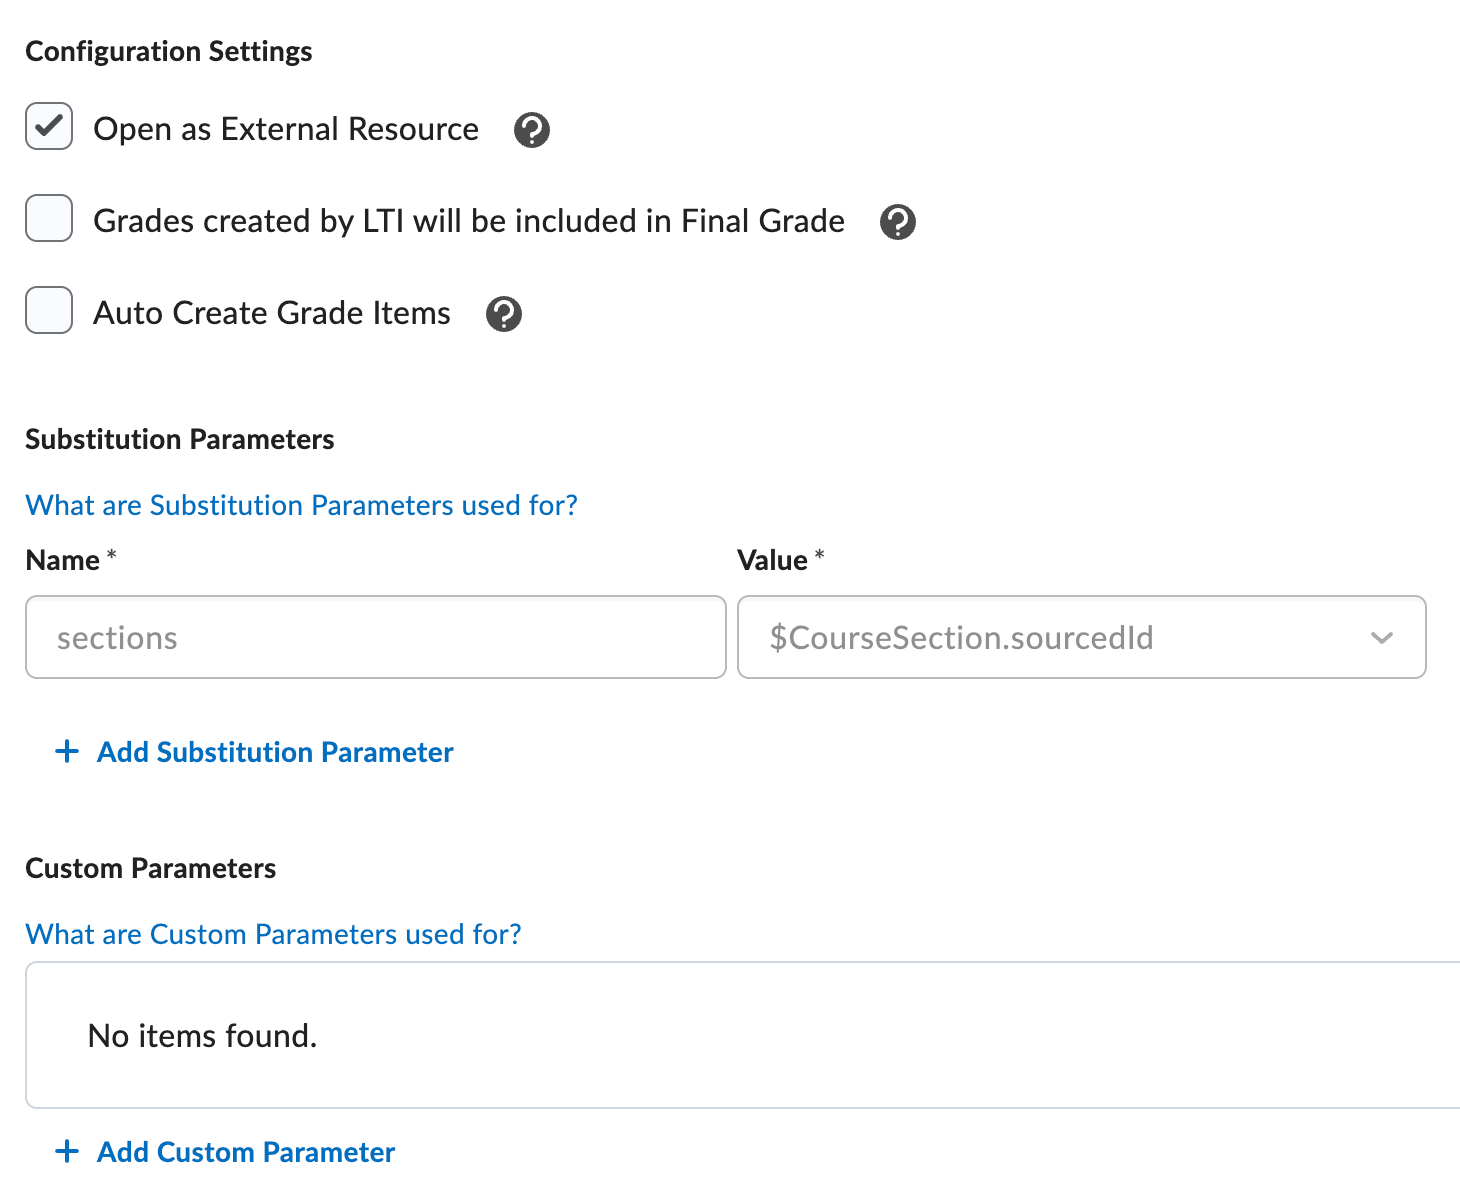
We will want this deployment to open in a new browser tab when launched by the learner or instructor. Select Open as External Resource.
Substitution parameters should be inherited from the earlier tool configuration. Leave as-is.
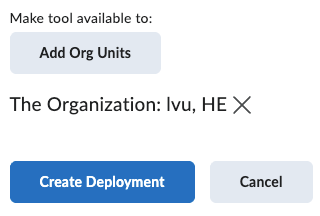
Add Org Units: Select which parts of your institutional hierarchy will have access to the tool: select specific courses, departments, or the entire institution to share the tool with… When finished, click Create Deployment and copy the Deployment Id when presented. Click Done.
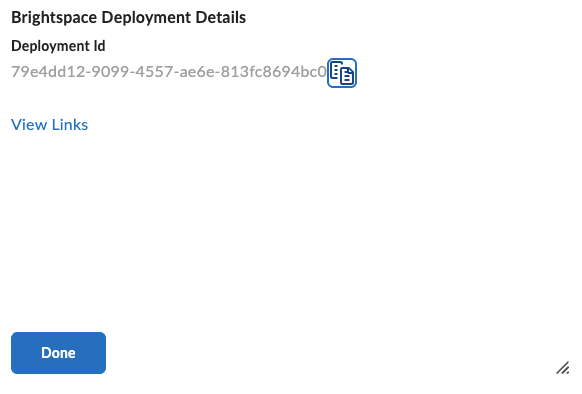
Copy the Deployment ID shown and save this information. You will need to provide this toLearnvia Support (support@learnvia.org) to complete the registration process.
Provide your Client ID (copied earlier) and Deployment ID to your Learnvia Support contact
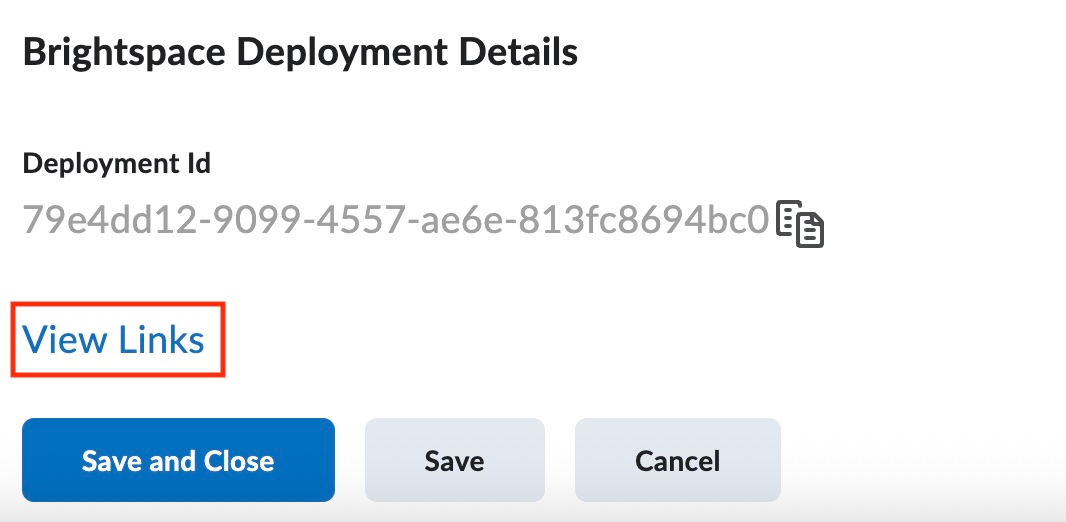
Click Save, (not Save and Close). Select View Links at the bottom of the page.
Click New Link
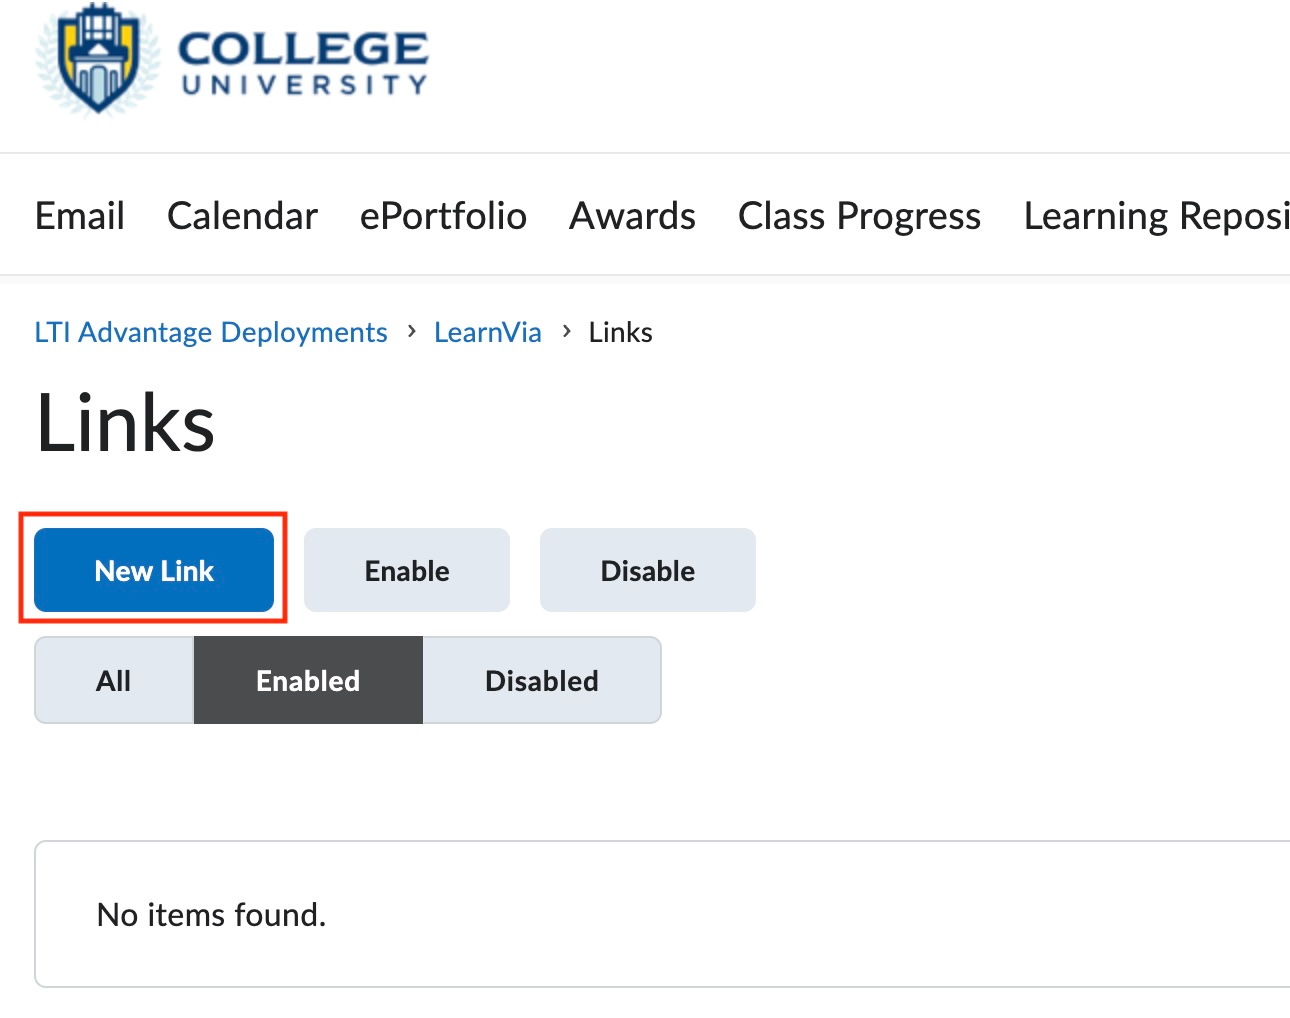 LearnVia > Links); the blue "New Link" button is highlighted with a red box; list shows "No items found."">
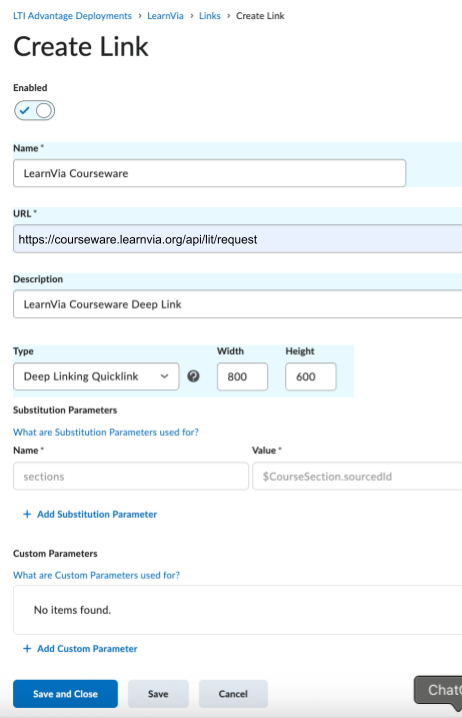
On the Create Link page, select enable and add LearnVia Courseware as the Name requirement. This is the name that will appear as the tool quicklink in a course.
Add the URL: https://courseware.learnvia.org/api/lti/request.
Select Deep Linking Quicklink as the Type. The width should be 800 x 600.
Click Save and Close.
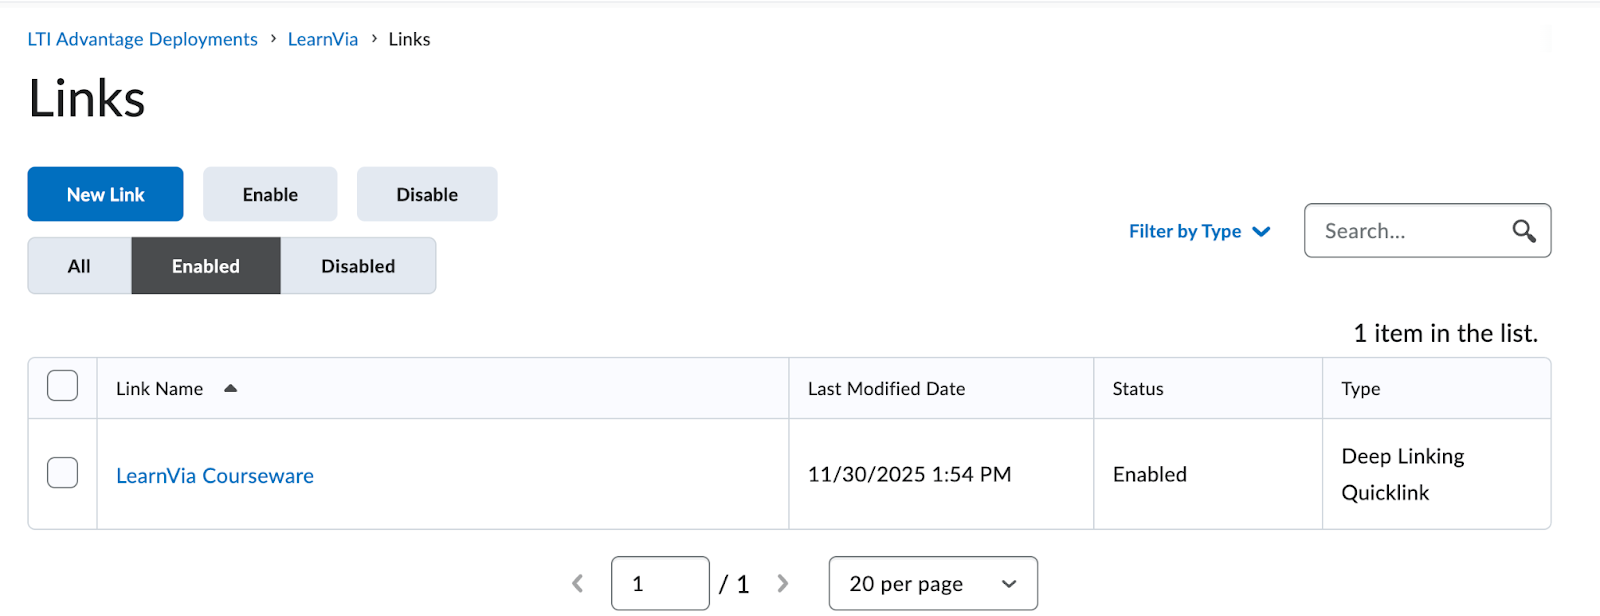
You should see something like this for the new link.
Was this article helpful?
That’s Great!
Thank you for your feedback
Sorry! We couldn't be helpful
Thank you for your feedback
Feedback sent
We appreciate your effort and will try to fix the article