This guide covers how to customize your course setup by organizing modules for each week of your course. Start by customizing the course setup to fit the instructional plan. Modules can be rearranged across weeks to reflect what should be due each week and align with the course content.
It’s important to arrange modules according to when assignments should be due. Once the assignment schedule is set, the modules in each week will be due during that week.
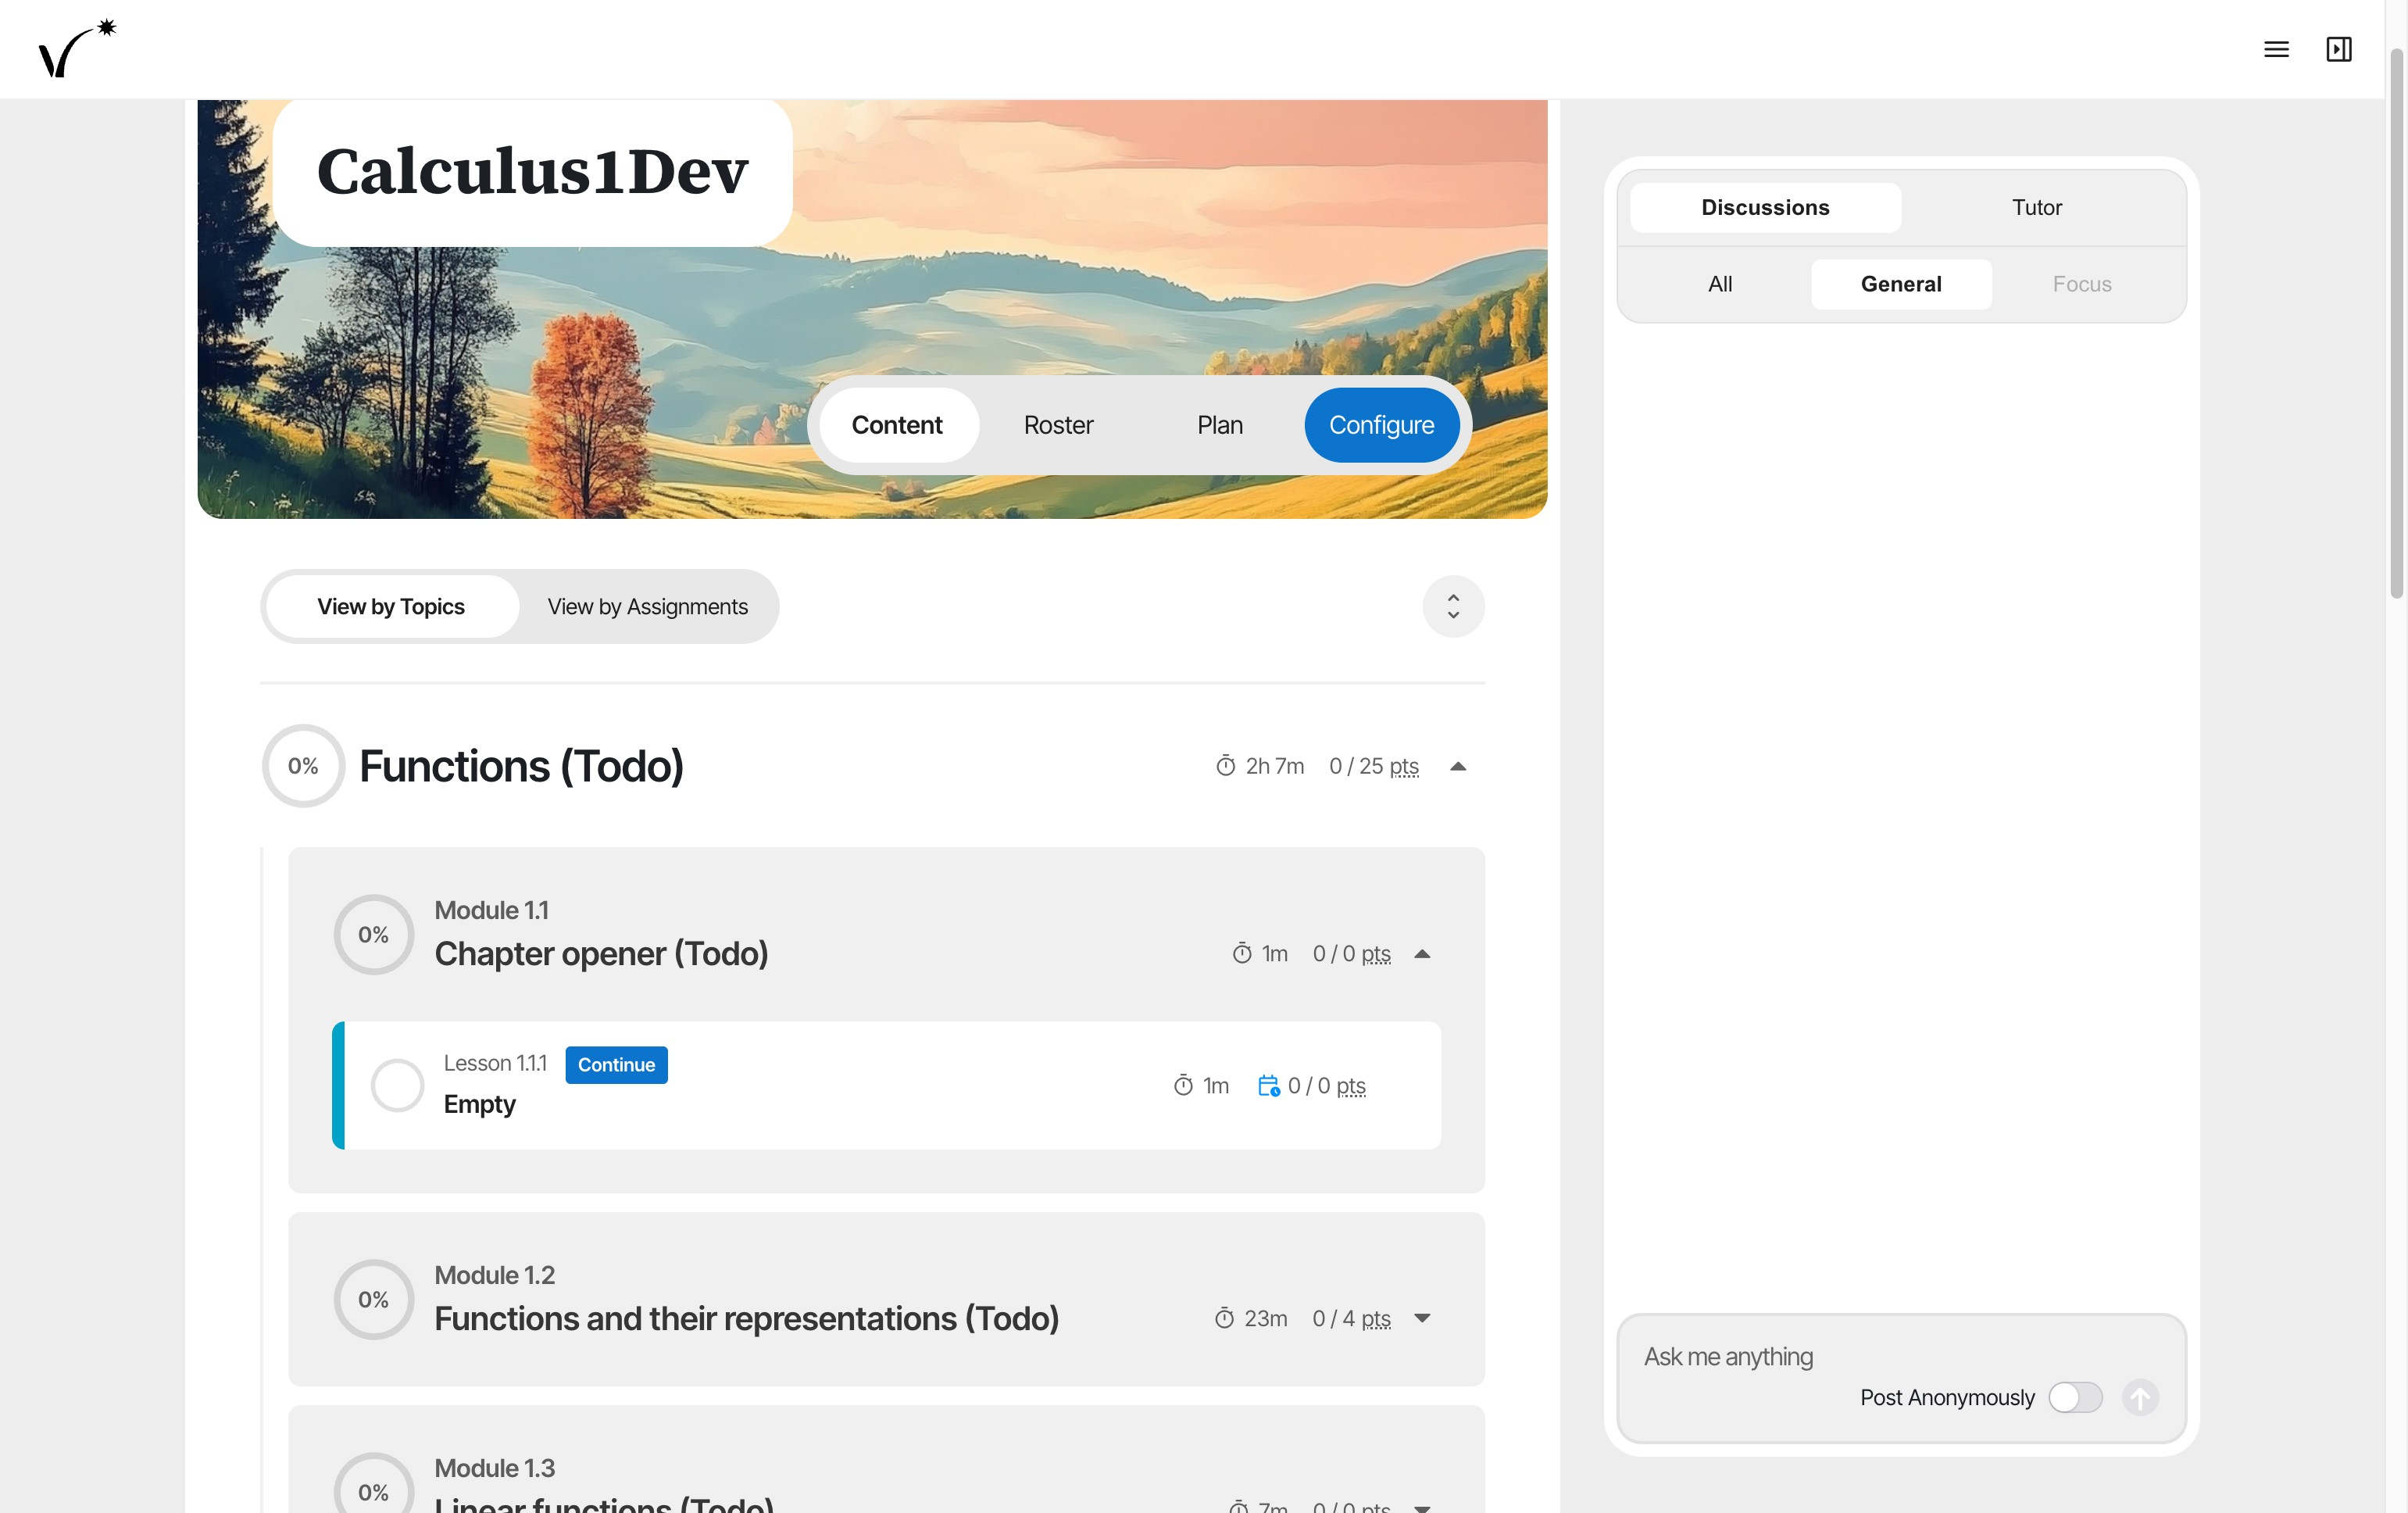
- Click Configure to access the course structure.
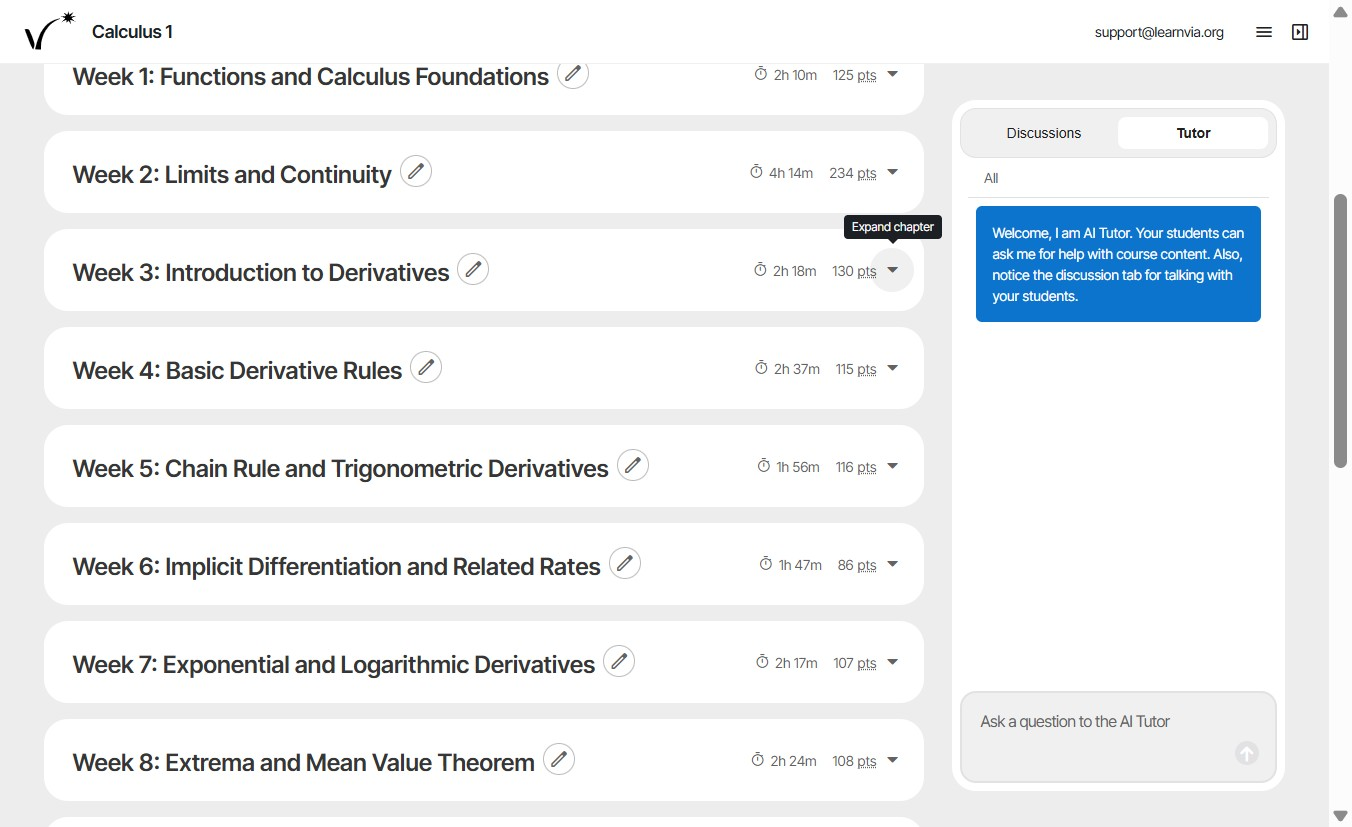
- Expand a week to reveal its associated modules.
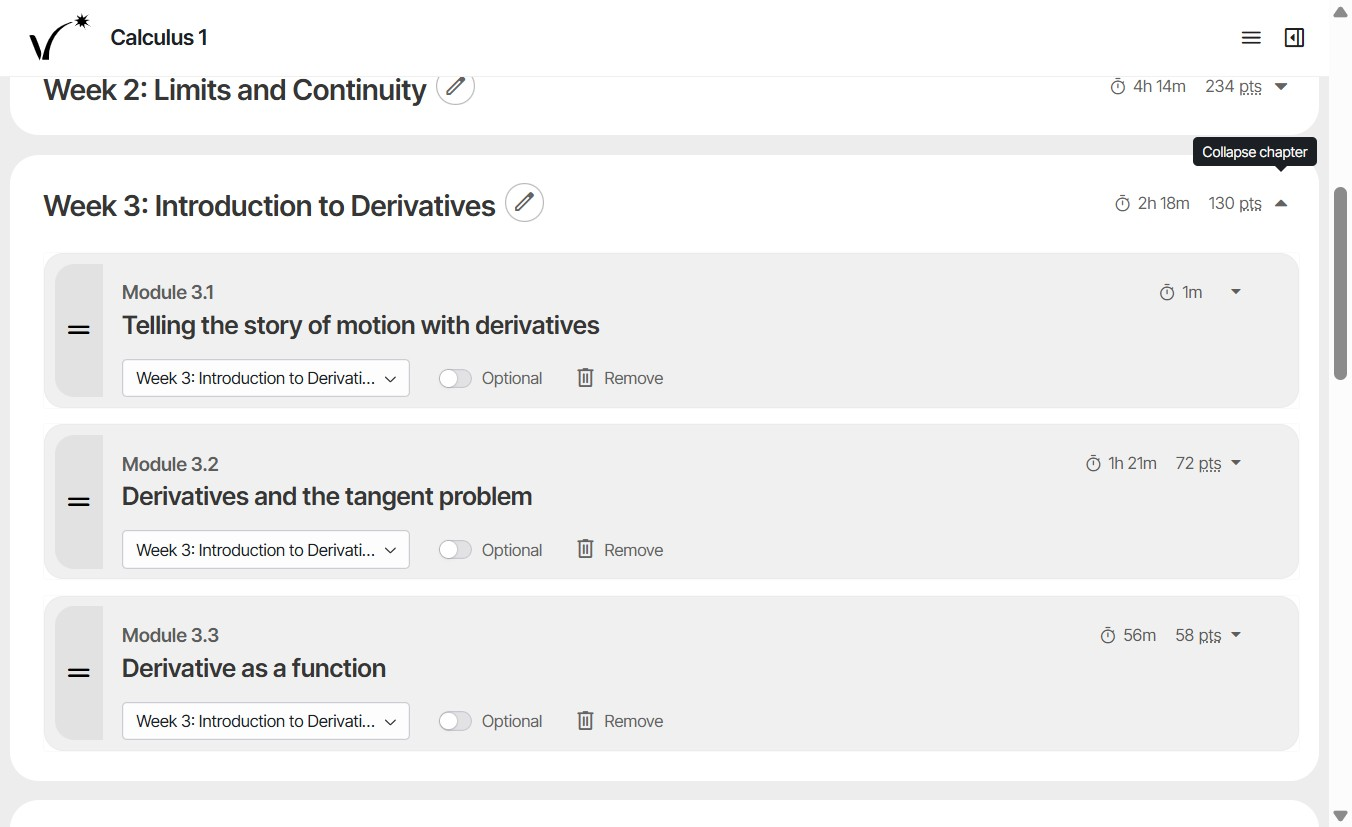
- Each week contains modules related to that week's topic.
- Drag to reorder modules within a week.
- To hide a module from students, click the Remove button next to it.
- Mark each module as Optional or Required based on course needs.
- Use the dropdown to move modules to different weeks.
- Rename weeks to match course content if desired. Tip: If you need more or fewer weeks, you can add or remove chapters (see below). If you would rather leave a week empty, consider renaming it “N/A” to avoid confusing students.
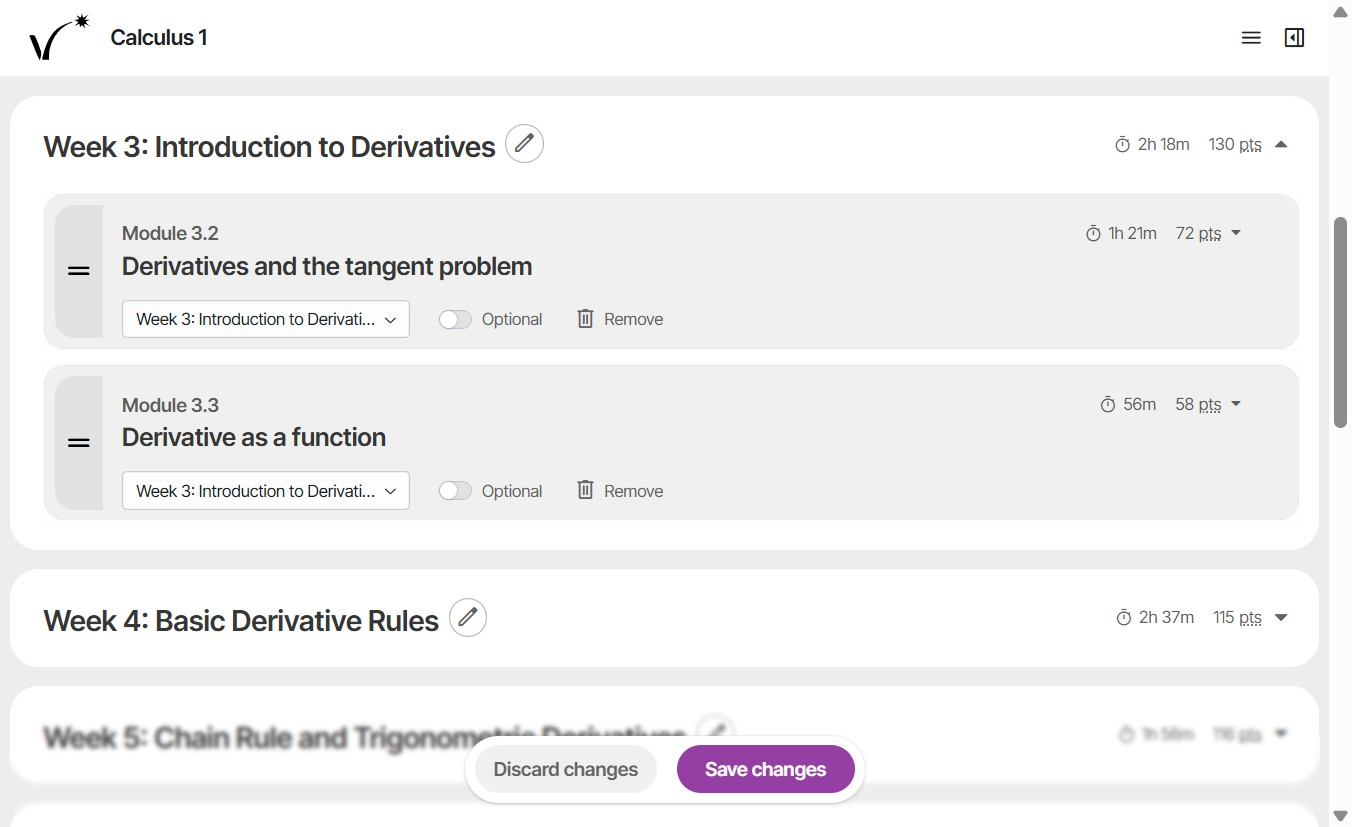
- Click Save Changes to apply updates.
Add a chapter
Chapters are the weeks you see in Configure. To add one, scroll to the bottom of the Configure page and click Add Chapter. A Confirm Add Chapter dialog explains that the new chapter is added to the end of your course, before any appendices. Choose Add Chapter to confirm. A new empty chapter named “New Chapter” appears at the end of your course. Use the pencil icon to rename it, then move modules into it from your other chapters. Remember to Save Changes after moving modules.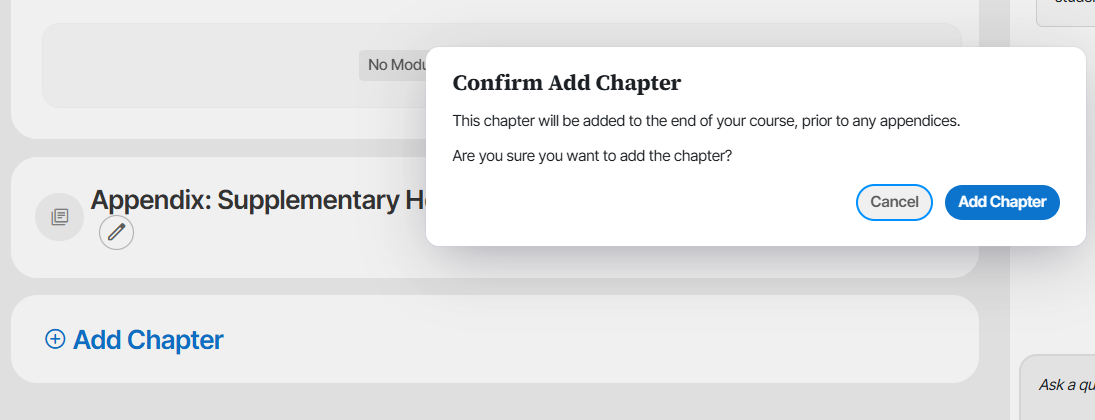
Remove a chapter
You can only remove a chapter that has no modules in it. Expand the chapter: an empty one shows No Modules and a Remove this chapter button. Click Remove this chapter to delete it. If the chapter still contains modules, move them into another chapter first, then remove it.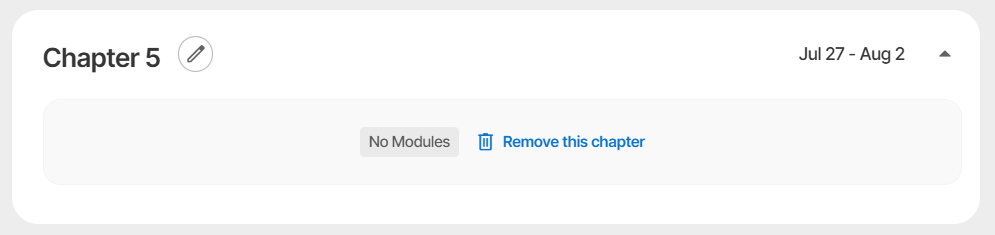
Was this article helpful?
That’s Great!
Thank you for your feedback
Sorry! We couldn't be helpful
Thank you for your feedback
Feedback sent
We appreciate your effort and will try to fix the article